
Last week was my nephew's birthday and I wanted to make him something for it.
He, like all little boys, loves super hero's, so I thought I would make him a cape.
I already had some real nice heavy black fabric that I could use.
So, I went to work, and loved how it turned out!
So did my son (the model...by the way, he definitely needs modeling lessons, it was like pulling teeth to get these pictures!)


I found this awesome tutorial that I used over at Keeping it Simple!
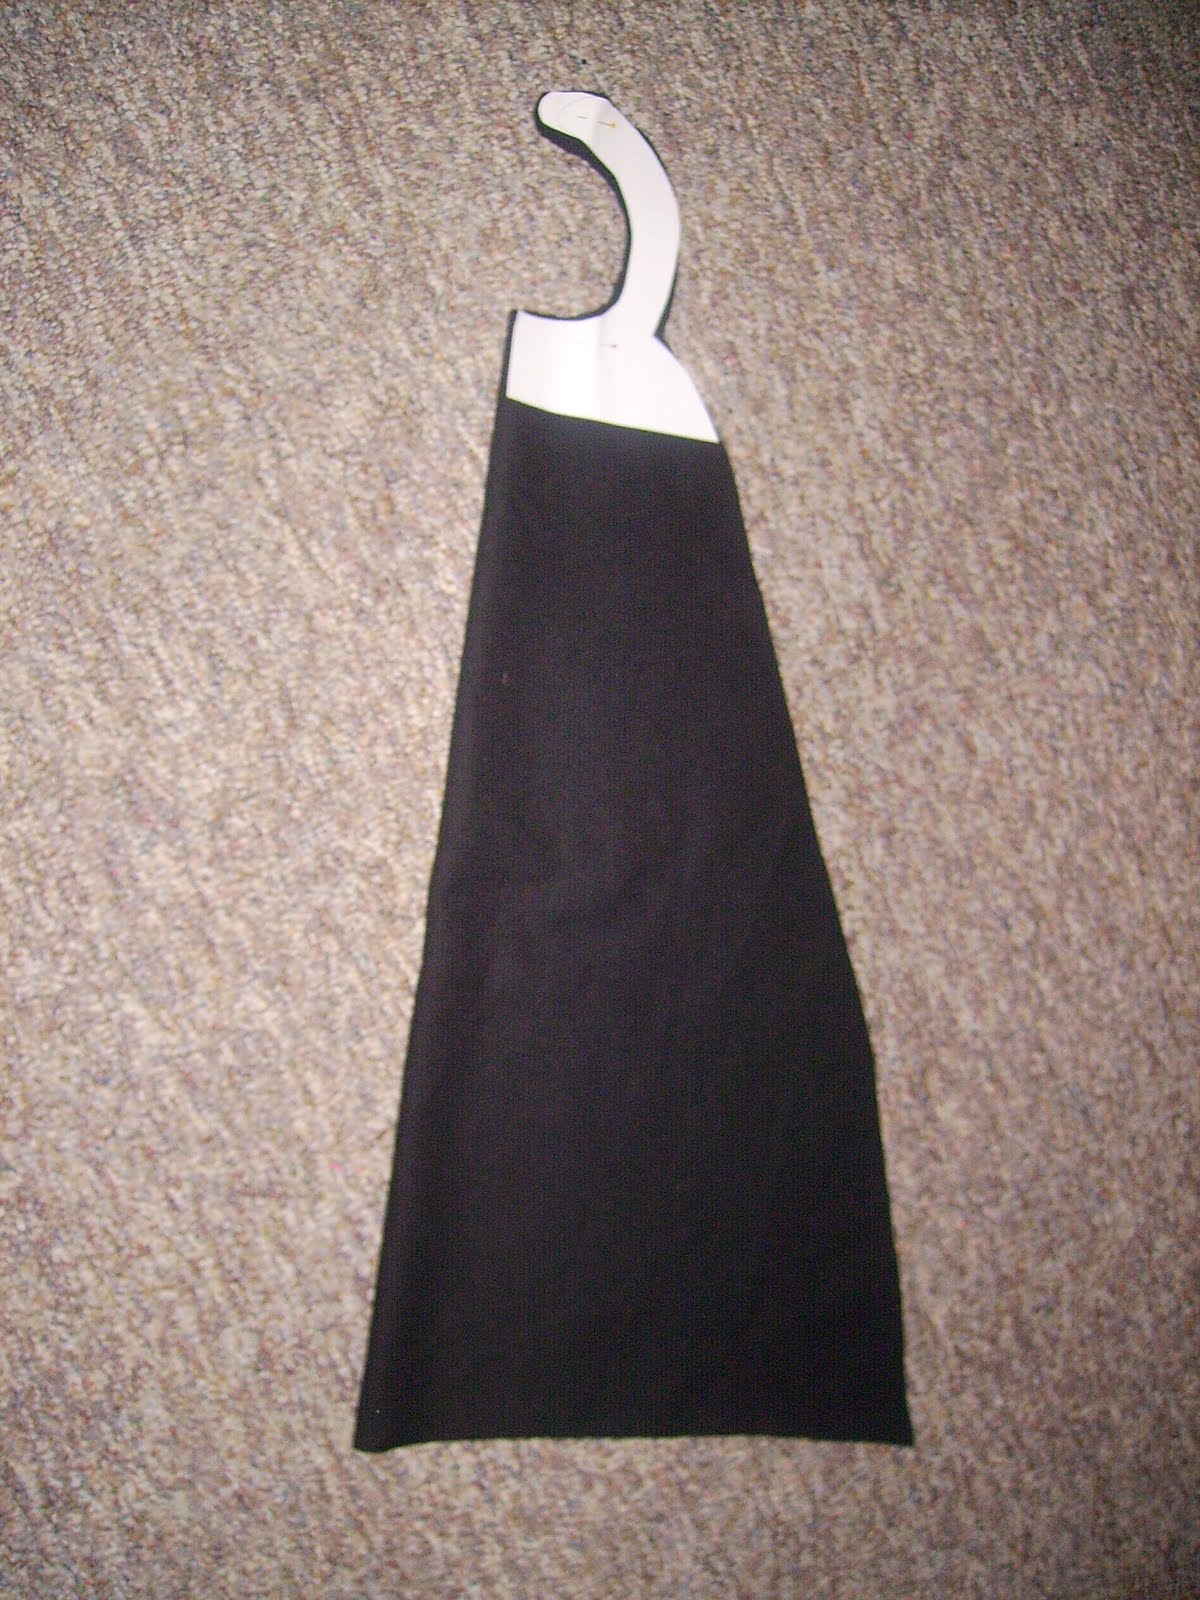
So I started with just drawing on some printer paper a pattern for the neck piece.
I measured my son's shoulders and made the pattern 1/2 of the distance between his shoulders, since the fabric will be folded in half.
So I started with just drawing on some printer paper a pattern for the neck piece.
I measured my son's shoulders and made the pattern 1/2 of the distance between his shoulders, since the fabric will be folded in half.

I folded my fabric in half, and cut it out. Make sure you measure how long you want your cape to be.
 I cut out two pieces, because I didn't want any fraying.
Pin your pieces together and sew all the way around, making sure you leave about 5 inches open to turn it right sides out.
 Once you have it turned right sides out, sew up your open part.
Then I added some Velcro on the straps.
I used my silhouette for the L star figure. I used the white heat transfer paper.
Make sure you mirror your image before you cut it on your heat transfer paper.
To mirror your image, just right click on the image and it will bring up the mirror option.
Once you have cut your image, peel off any excess paper you don't want ironed on.
Make sure you mirror your image before you cut it on your heat transfer paper.
To mirror your image, just right click on the image and it will bring up the mirror option.
Once you have cut your image, peel off any excess paper you don't want ironed on.
Then stick your image on your cape where you want it

Make sure you cover with a cloth and iron for about 1 minute.

Then let it cool and peel off your plastic adhesive.

Whalaaa!! You have a personalized cape!!1
My son thinks this is very cool!
I think I will be making one with an "M" in the middle for him very soon!!
I think I will be making one with an "M" in the middle for him very soon!!


Now if I could just get him to model better! :)

I bet the birthday boy loved it, capes are the perfect kiddo gift!!
ReplyDelete