Showing posts with label re-purposing. Show all posts

6/30/11

4th of July outfit!


I made this 4th of July outfit for my daughter last year actually, so I don't have a tutorial on it.

It was super easy though.

I just took a love sleeve shirt and cut of the sleeves then made some bias out of the star knit and sewed it around the arm holes.
And added 3 strips of ruffles to the front.

For the skirt:

I just made a simple skirt and added a ruffle to the bottom.
So easy!

I think it turned out cute!


I had to add this picture, I think she had the cutest profile ever!!


Happy 4th of July!


6/16/11

re-purposing: Long sleeve shirt to soccer shirt

I know I am on a sewing, re-purposing kick lately!
But I am slowly trying to make my way through my stash!

This was a super easy way of taking a long sleeve shirt and making it into a short sleeve,
then I just added the soccer ball with my silhouette using heat transfer.


I think I paid $1.00 for these shirts at Walmart in the early spring!
I love to stock up when they are on clearance!

I cute the sleeves off where I wanted them to be.
Then I cut a strip off the top of both of the sleeves (the sleeves I just cut off)


fold in length wise and pin all the way around


Then I slid the circle part I just made on top of the sleeve with raw edges together!
Does that make sense???
a closer look!!
then sew all the way around the sleeve, and you can iron it down to give it a more crisp look!
Now you have short sleeves!!! Awesome!


Then I added the soccer ball using my silhouette and heat transfer.
For more info on the heat transfer you can follow my steps Here


The best part about it is she loves it!!!

6/13/11

Re-purposing: Dress to ruffle shirt

Another re-purposing post! I have been in the mood to sew I guess!
This has been my favorite so far though!

My mother in law was getting rid of some clothes,
and let me look through the bag before it went to the D.I.
and there was this dress that looked hardly worn.
The wheels started turning....
and this is what I came up with!

So first of all I cut off the bottom and had to take it in.
After I cut several inches off I turned it inside out and pinned it where I wanted to take it in.


Then on the seams I did a zigzag stitch to give it the surged look!

Then from the part I cut off, I cut it into strips,
then sewed the strips together and made ruffles out of it.
Then sewed the ruffles all the way around the neck and down the front!

Here is the back view!


I love how it turned out...now I have to do one for myself!!

6/11/11

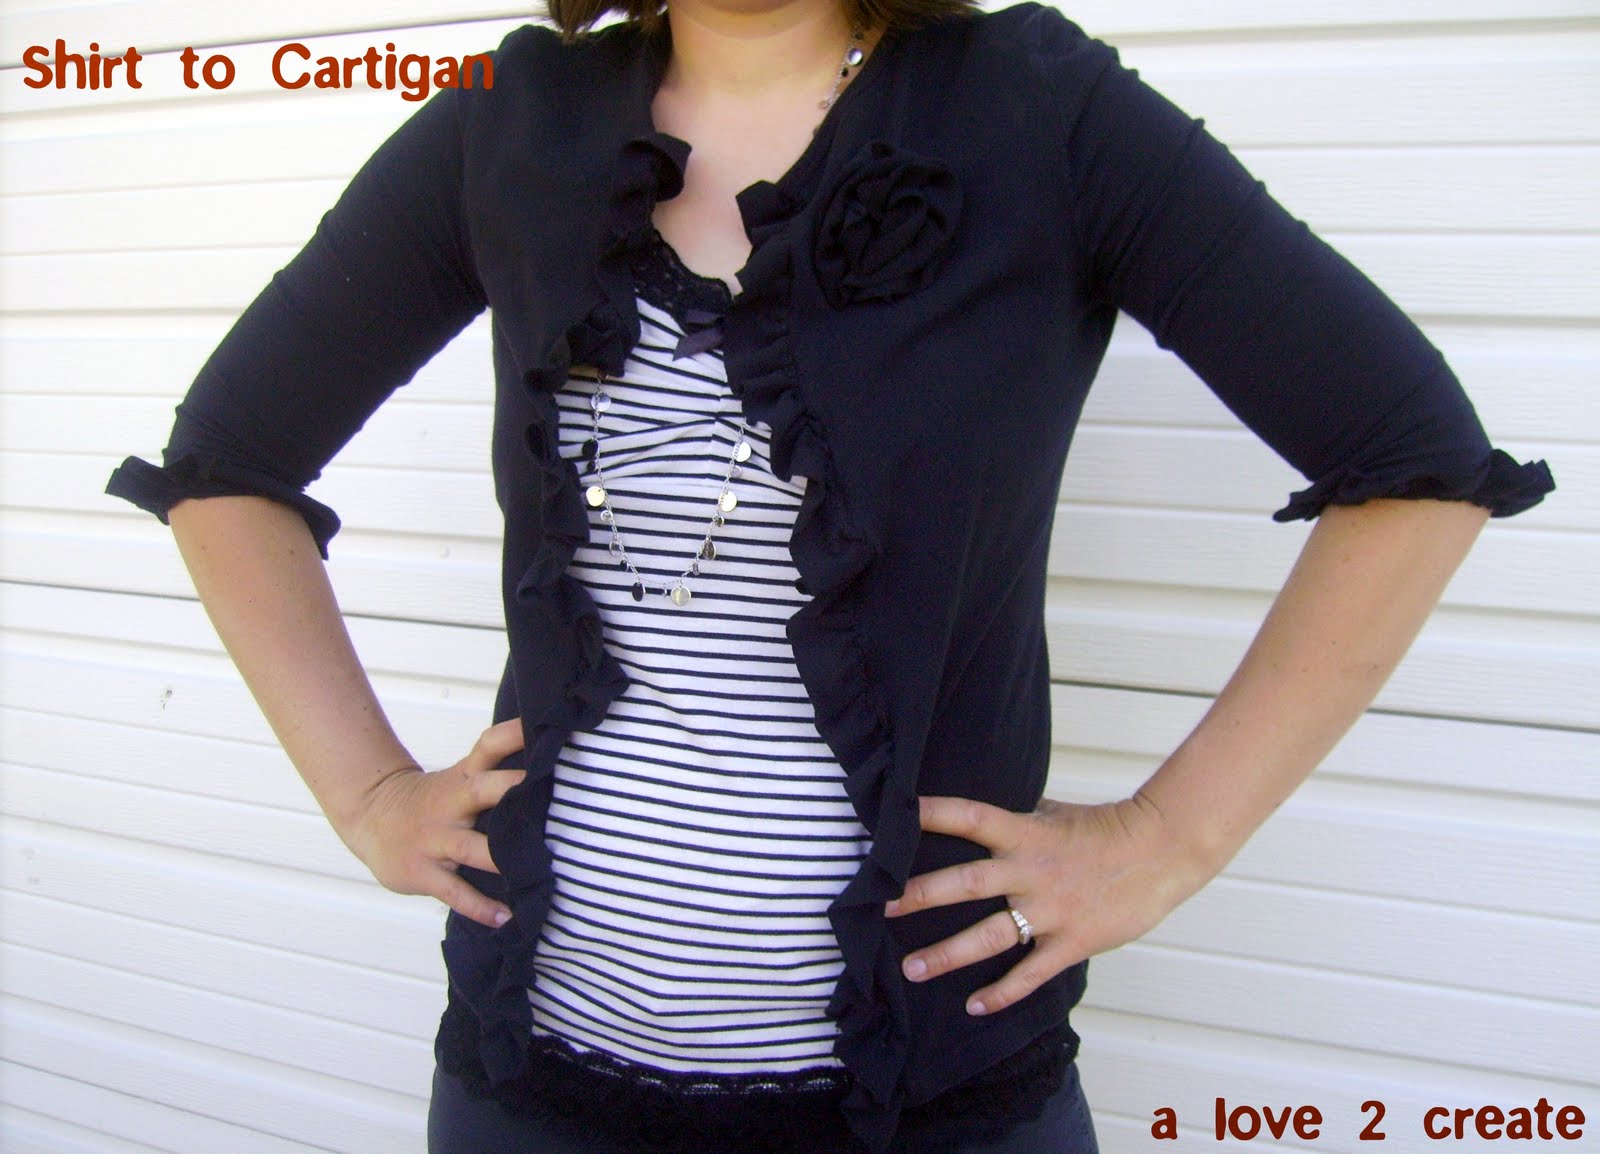
Re-purposing: Shirt to Cardigan

I have a HUGE stash of clothes that I don't wear anymore, but don't want to give away (Heaven's no)...and have an idea of what I want to do with every single last one of em!!

But they have sat in a pile for months....and months....

But I am proud to say this week I have gotten several of them done...this being one of them.


I took this plain Jane, black, long sleeve shirt and cut it right down the middle!

If you couldn't picture that...well here is a picture to show you!


Then I took this other black polo shirt that I haven't worn in months...maybe years and cut it up!


I cut it in strips, starting from the bottom...oh and I saved the top part, because yes, I have a plan for it too! Waste not...want not....
I sewed all those strips together and then ruffled them by sewing a large basting stitch at the top and pulling the bottom thread to create ruffles.
I did it in about 2 foot increments. Don't try and sew it all the way down and think you can pull that bottom thread for the whole thing...won't work! I have learned this the hard way!


With what I had left over in ruffles I made this flower and pinned it on!

I HATE modeling...and I think all my neighbors think I am weird...or vain. I feel funny having my daughter take pictures of me, I am sure they think I am so vain!
I do love how it turned out though...even if my husband said I look like I am going to play in a concert...what a weirdo! :)


5/26/11

Re-purposing: Turtle neck shirt to dress tutorial


Today I am going to show you how I took an old turtle neck shirt of mine and turned it into a dress for my daughter.

So, if you have an old shirt and would like to give it a try....grab it and give it a shot!!

It is so fun to take something old and make something new!!


I forgot to take a picture before I started this lovely project many months ago, so it is already attached to the bottom, but you get the idea what it looks like!

Just a normal shirt...right?


I started off by cutting off the turtle neck part, leaving about 1/4 of an inch.


Then from the part that I cut off, I took it and folded the ends in and iron flat.


Then fold again and iron flat

Then I pinned it all the way around the neckline and sewed it with a straight stitch.


Now for the sleeves, I wanted to add something to the boring old sleeve.

I marked with a pin where the middle of the sleeve was.


Then to get the gathered look, I sewed a large straight stitch about 5 inches up.
(Make sure you don't back stitch on either end)

Then take your top thread and gently pull and it will gather as you pull.

Then when you get it as ruffled as you want, I tied off the strings, or you can sew on top of the gathered part to keep it in place.


Now for the bottom part, I took my material and hemmed up all the sides.

At the top I also did a gathering stitch and then attached it to the shirt.

Here is a great tutorial on this part!

After you sew the two pieces together it should look like this.
Then I added a waistband to it with left over material.


What a great way to use an old shirt!!!
Give it a try...you will be glad you did!

Related Posts Plugin for WordPress, Blogger...